Azure Computer Vision has some nice and easy to use APIs that can help us to generate captions and alternative text for images.
What Is Azure Computer Vision?
Azure Computer Vision is an artificial intelligence service that can be used to analyse images and videos. It has a free tier that makes it nice for developers to play around with and has a REST API, which we will use in this tutorial.
Setup Azure Computer Vision
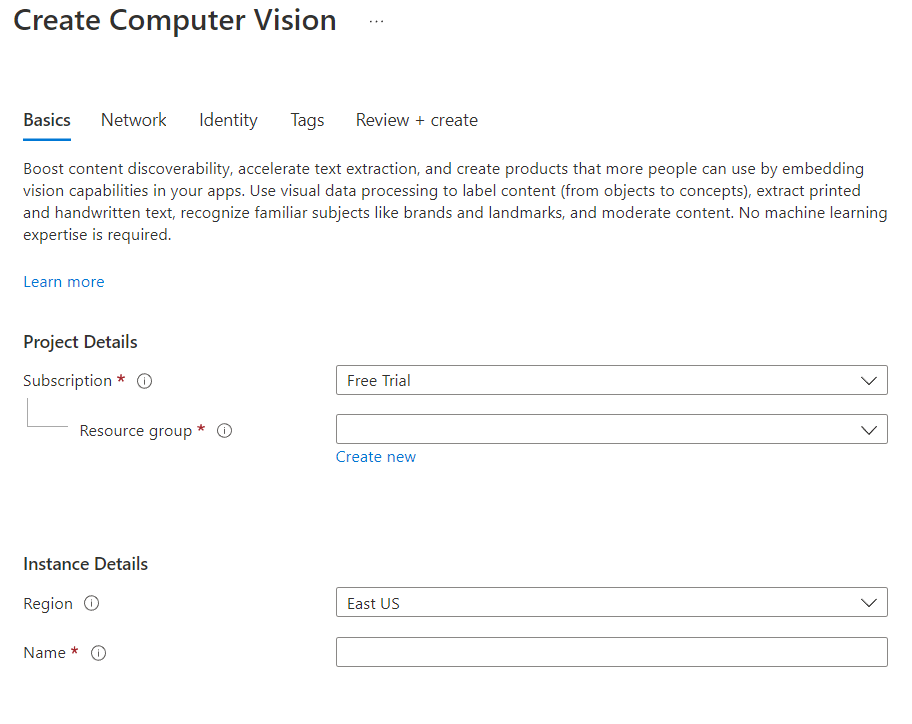
Firstly, you need to sign up for Azure if you haven’t already. You can do this from the Azure Computer Vision homepage. Just click on “Start free” and off you go. If you haven’t signed up to Azure before you will need to add a credit card, but if you just use the free tier of Computer Vision you shouldn’t be charged. Next up in Azure Portal search for “Computer vision” and then click on create. Then fill in the create form, which should look something like the screenshot below.
Example Code
In this tutorial we are going to build a simple page that will allow users to generate alternative text using AI for their images.
HTML
For the HTML, we are just creating a simple form that allows users to enter the URL of their image to be processed. We are also including a section to display the results.
<form class="js-image-form">
    <label for="imageUrl">Image URL</label>
    <input class="c-form__input js-image-url" type="url" name="imageUrl" id="imageUrl" value="" placeholder="Enter a publicly available image URL" required="required" />
    <div class="c-form__error js-image-error" aria-hidden="true">An error occurred processing your image. Please try a different image or try again later.</div>
    <button type="submit" class="js-image-submit-button">Generate Alt Text</button>
</form>

<div class="js-result" aria-hidden="true">
    <h2>Result</h2>
    <img src="" class="js-preview-image" alt="" />
    <div>
        <p>Suggested Alt Text: <span class="js-alt-text"></span></p>
        <p>Confidence: <span class="js-alt-text-confidence"></span></p>
        <p>Tags: <span class="js-alt-text-tags"></span></p>
    </div>
</div>
JavaScript
Next up for the JavaScript we add an event to the form to capture the image URL.
document.querySelector('.js-image-form').addEventListener('submit', function (event) {
    event.preventDefault();
    var imageUrl = document.querySelector('.js-image-url').value;
    handleSubmit(imageUrl);
});
We can then use the fetch API to make a POST request to analyse the image.
The endpoint needed will be displayed in the overview tab on the resource in Azure. It will be something like https://YOURPROJECTNAME.cognitiveservices.azure.com. You also need the Ocp-Apim-Subscription-Key, which is in the “Keys and Endpoint” tab on the resource in Azure.
function handleSubmit(imageUrl) {

    fetch('https://YOURPROJECTHERE.cognitiveservices.azure.com/vision/v3.2/analyze?visualFeatures=Description', {
        method: 'POST',
        headers: {
            'Content-Type': 'application/json',
            'Ocp-Apim-Subscription-Key': 'SUBSCRIPTIONKEYHERE'
        },
        body: JSON.stringify({
            url: imageUrl
        })
    })
    .then(function(response) {
        if (!response.ok) {
            throw new Error("HTTP status " + response.status);
        }
        return response.json();
    })
    .then(response => response.json())
    .then(data => {
        displayResult(data, imageUrl);
    })
    .catch((error) => {
        console.error('Error:', error);
    });

}
Finally, lets display the results.
function displayResult(data, imageUrl) {
    document.querySelector('.js-result').setAttribute('aria-hidden', 'false');
    document.querySelector('.js-preview-image').setAttribute('src', imageUrl);
    document.querySelector('.js-preview-image').setAttribute('alt', data.description.captions[0].text);
    document.querySelector('.js-alt-text').textContent = data.description.captions[0].text;
    document.querySelector('.js-alt-text-confidence').textContent = data.description.captions[0].confidence.toFixed(2);
    document.querySelector('.js-alt-text-tags').textContent = data.description.tags;
    document.querySelector('.js-image-form').reset();
}
Below is an example response from Azure Computer Vision of a photograph of an icecream.
    {
    "description": {
        "tags": [
        "food",
        "dessert",
        "cup",
        "plant",
        "cream"
        ],
        "captions": [
        {
            "text": "a cup of ice cream",
            "confidence": 0.4577445387840271
        }
        ]
    },
    "requestId": "29bf6be8-a5e8-4706-9a48-33b7b5bee8ff",
    "metadata": {
        "height": 1024,
        "width": 681,
        "format": "Jpeg"
    },
    "modelVersion": "2021-05-01"
    }
Full Working Example
Here is the full working example for you to have a play around with and make something cool from for yourself.

